

S.T.E.A.M. at Home: Recycled Rafts
In these times of learning at a distance, many S.T.E.A.M. teachers have been caught off guard. Not having uniform kits prepared for all of their students made conducting a virtual S.T.E.A.M. course challenging. In this series, we are going to offer lesson ideas for the S.T.E.A.M. teacher that can be completed with students virtually using items that can be found at home or acquired for a minimal cost. This is also an opportunity for children to get their parents involved in the learning process and raise awareness about your S.T.E.A.M. program. Our last project centered around the culinary arts in the creation of a cool desert from scratch. This project will focus on the students’ design capabilities as they scavenge for materials around their home in an attempt to build a raft.
Lesson Name: Recycled Rafts
Lesson Description: This lesson is a great opportunity for children to identify and reuse materials found around their home. It is also an occasion to teach about the value of recycling by giving objects an alternate purpose. Students can also develop the ability to make predictions about whether an object will sink or float based on itsir density.
Overview: This project should follow a mini-lesson on ‘sink or float.’ Have students explore with a series of objects and ask them if they think the objects will sink or float prior to testing the object in a sink or basin of water. For example, have them examine a ball of clay or foil. Why does the ball of clay or foil sink? How could we get the clay or foil to float? Think of how a boat is designed and why it floats.
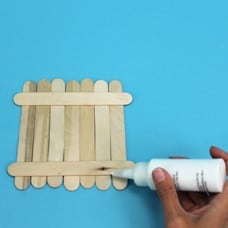
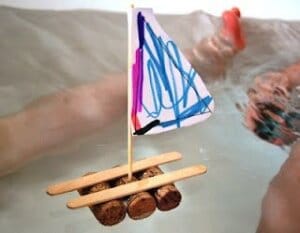
Give students and their parents/guardians advanced notice as to the material requirements for this project so they will have time to gather what they will need. Teachers can give some guidelines about the minimal requirements, but let children add components as they see fit. It’s always fun to see what students come up with when they are given the freedom to create. Have students go on a mini scavenger hunt around their homes. A basic raft will consist of two bottles or cans of equal size. These two bottles are attached together side-by-side by gluing several pop sticks perpendicularly across the bottles. A small hole cut in the center of the raft will allow for a mast. Construction paper can then be used to create a sail. Children may want to explore other sources of propulsion like a rubber band powered propeller and they may also wish to add a pop stick rudder for control.
S.T.E.A.M. Integration
Science: The science behind this lesson is in the making of predictions about what it takes to make an object float. Students will create an object that has the capability of floating on the water’s surface because it is less dense than the water.
Technology: Students will be able to power their raft with simple wind power, but the teacher can expand the discussion to include other technologies as a power source.
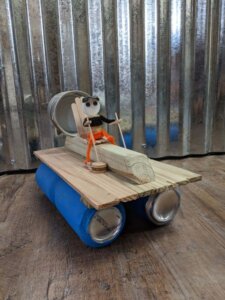
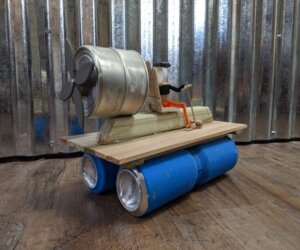
Engineering: The engineering is in the design of the raft. This is a great opportunity for students to show their creativity as they have much discretion in their choice of materials and design.
Art: The art is not only in the design of the raft, but also in how it can be decorated to stand out from the others.
Math: Mathematics enters this lesson with the concept of buoyancy. Students can explore how different materials sink or float depending on their density.
Extend-Expand-Explore: There are limitless configurations for a recycled raft. Students should explore different model possibilities using various materials for the raft and sail. Have students make predictions as to whether the raft will sink or float.
Lesson Plan
Title: Recycled Rafts
Objective: Students will learn how to salvage and repurpose recyclable materials into a floating device.
Materials: empty water bottles, empty soda cans, pop sticks, glue, wooden dowel, construction paper, corks, tape, other miscellaneous recycled materials
Procedure:
- Begin by having students go on a mini scavenger hunt around their homes. They should be on the lookout for empty bottles, cans, pop sticks, etc.
- Select two bottles or cans of equal size.
- Attach these two bottles together side-by-side by gluing several pop sticks across the bottles in a raft orientation.
- Create a small hole in the center of the raft large enough to insert the wooden dowel.
- Cut the construction paper to size and adhere it to the dowel with tape as a sail.
Conclusion: Have a group discussion with the participants. Ask them to share a picture of their raft with the group. Students can test out their rafts in a bathtub, basin, inflatable pool, etc. Have them blow on the sail to make it move.