

7 Summer STEM Experiments to Try With Your Kids
Summer is here, which means it’s time to decompress and slowly start to prepare for the upcoming school year. This is the perfect time to plan out some fun STEM experiments for your class that you can try out on your own kids first. It’s fun, educational, and it’s getting you prepared for the year. That’s a win-win-win! The Plymouth Rock Teachers’ Lounge has compiled a list of 7 STEM education experiments to try with your kids this summer. Have fun and let us know how it goes in the comments below!
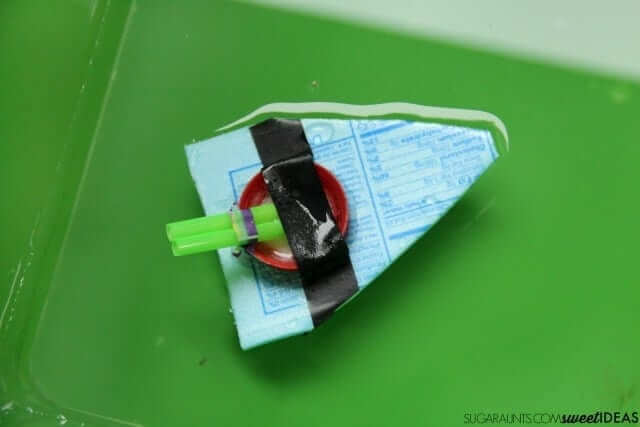
1.) Vinegar Baking Soda Powered Boat
Vinegar and baking soda make for a good time no matter what you are doing. Add in a homemade boat and it’s a recipe for fun. Simply cut out a triangle shaped piece of styrofoam (an old egg carton works great). Next, tape on a plastic lid from a juice container. Then cut a straw so that there are 2 equal parts roughly twice the length of the lid. Tape the straws to the lid and you are ready to power your boat! Place your boat in a baby pool or bathtub filled with water. Fill the juice lid with baking soda and then slowly pour in vinegar to the lid. Watch as your boat zips across the water!
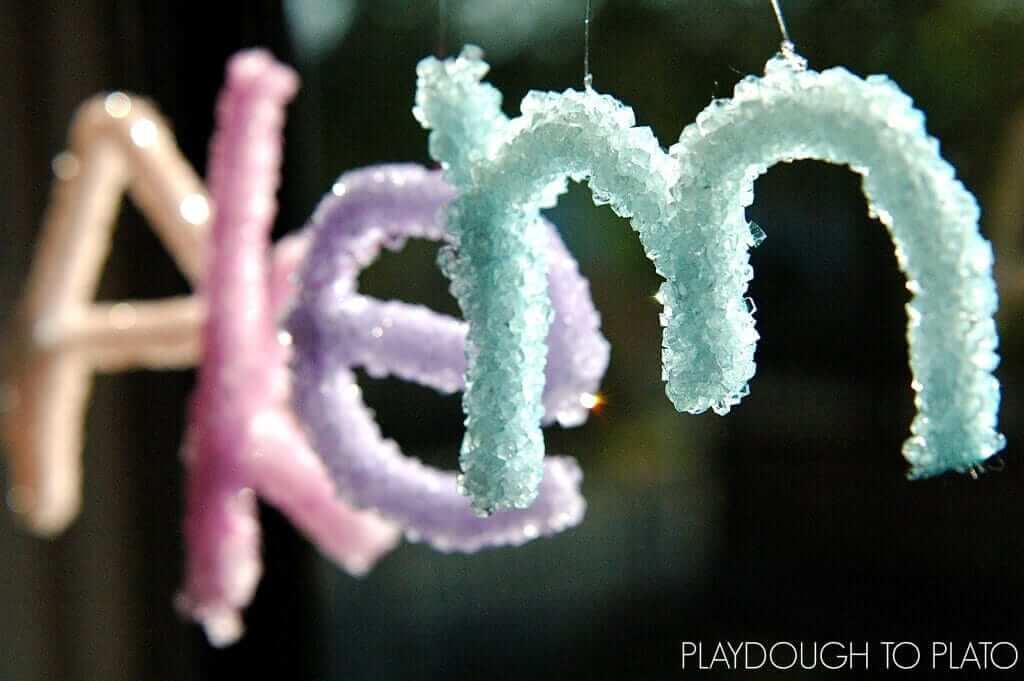
2.) Crystal Name
Since every kid has used Borax at least 1 million times at this point for creating slime, it’s safe to say that the crystal letters will be a big hit. First, get white pipe cleaners and shape them to the letters of your name. Fill containers with 3 Tb Borax per cup of hot water, mix and add in food dye. Using a jar and a wooden stick or skewer, suspend each letter with fishing line attached to the stick so that the letter doesn’t touch any part of the jar. Carefully pick up your letter/name and dip into the container with the Borax solution, then return to the jar to hang and dry. Allow them to harden and form for several hours, or overnight.

3.) Color Mixing With Light
Color mixing with light is so much fun, kids both young and old will appreciate the project. Simply take 4 small flashlights (Dollar Tree has them if you don’t), and cover each one with a different color piece of cellophane (green, blue, red, yellow) attached with a rubber band. Go to a dark room with a white surface and begin mixing your colors. Using a worksheet allows kids to write down what the colors make when mixed. The link above has a worksheet you can download if you don’t already have one.

4.) Shaving Cream Rain Clouds
This experiment looks positively fascinating and is a great way to help kids understand evaporation and rain. To begin, fill several glass vases or bowls with water ⅔ full. In small cups add a little water and food coloring. Top the large water bowl with a large amount of shaving cream. Using an eyedropper, drip several drops over the shaving cream. Sit back and watch it “rain” a rainbow.

5.) Elephant Toothpaste
What could be more fun than watching something erupt in an explosion? Thankfully, this non-dangerous experiment is so easy, it’s fascinating. All you need is water, yeast, food dye, and hydrogen peroxide. To begin, mix 1 tsp yeast with 2 Tb warm water and set aside in a separate bowl. In an empty soda bottle mix half a cup of hydrogen peroxide, 4-5 drops of food dye, and a squirt of dish soap. Set your soda bottle inside a pan or deep dish to catch the overflow. Add the yeast mixture to the soda can and watch your elephant toothpaste ooze out everywhere!

6.) Pop Rocks Expander
Pop Rocks candy adds a little fun to any afternoon. Adding it to soda makes for a fun STEM education experiment. To begin, using a small funnel, dump the contents of the Pop Rocks into a non-inflated balloon. Opening the lid of a soda bottle, secure the balloon to the top but don’t let the candy contents fall into the bottle until you are ready. After it’s securely attached, release the contents and watch the reaction as the balloon inflates.
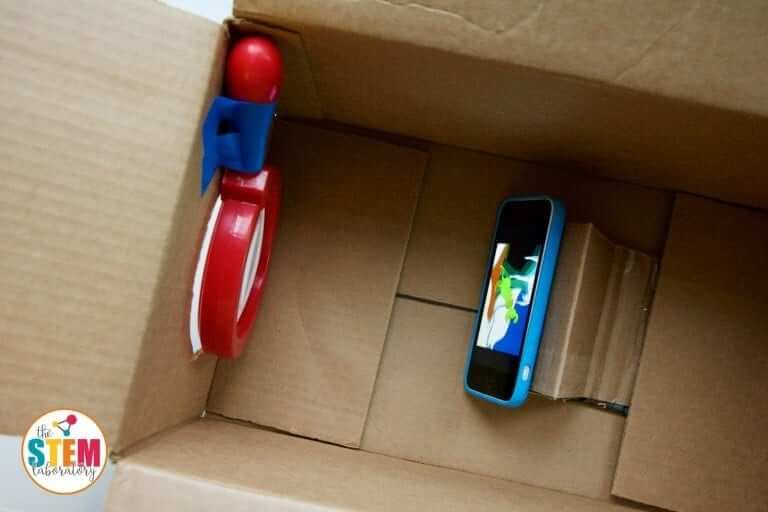
7.) DIY Smartphone Projector
Play a family movie or YouTube video right from your phone using a homemade smartphone projector. You will need a box, scissors, tape, and magnifying glass. To begin, cut a hole out of the box in a circle the same size of the magnifying glass. Using a piece of cardboard fold it a few times and secure it to the bottom of the box to hold your phone up. Tape the magnifying glass to the box covering the hole. Last, place your smartphone in the box on the stand that you have made. Be sure to put it upside down or else it will be upside down on the wall. Dim the lights and enjoy your very own movie.
-Jenna Garvin


