


Build a Better Bridge: An Integrated S.T.E.M. Lesson
Overview
Our previous project presented us with a physical change. In this project, we will test physical strength. This multi-phase project will span the course of a week and is appropriate for grades 3-5.
Designed to accommodate your STEM budget, you will need an array of building materials including Popsicle sticks, clay, glue, marshmallows, spaghetti strands (uncooked), gumdrops, KynexTM building toy and a set of pan balance weights.
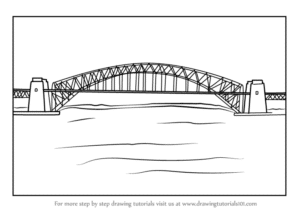
Have your student groups research some famous bridges around the world. They may decide to model their design after a real-world bridge or create something original.
Next, allow students to sketch a plan or blueprint for their design. Use a straightedge or ruler and draw to scale having the measurements on the blueprint reflect the size of the model they will build.
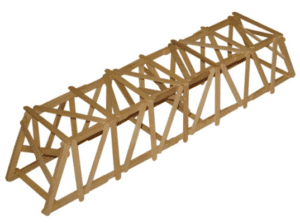
Then decide which building materials you will be using to construct your bridges. Popsicle sticks can be held together with glue or clay. Spaghetti strands connect well with gumdrops or marshmallows. The KynexTM building toy will be used to interconnect.
The actual building of the model bridges will take multiple days. This is especially true of bridges using glue, as you will need to allow for drying time.
Following the design and construction phase is the testing phase. This is a chance for the student teams to demonstrate the strength of their bridges. Begin by placing the bridge across a gap created by the separation of two tables or desks. Proceed to add gradually increasing amounts of weights to the bridge. You might consider placing a lightweight, flat surface on top of the bridge to allow for the placements of the weights. When the bridge begins to crack or separate, stop adding weights and record the total weight supported by the bridge for that team. You can make this into a contest; the winner will be the group whose bridge can hold the most weight. Advance your teams to the next round with the “earthquake” test. Here the bridge is once again placed agross a gap. The difference is, that the desks will 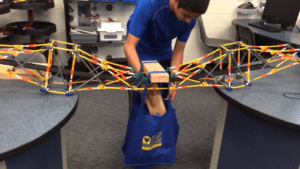 now be shaken as the weight is being applied. Suspend a bucket or bag from the bridge to deposit the weights. This is more difficult to survive because it makes the weight distribution uneven. Once again, continue to add weight until the bridge collapses. Then record the weight for that team.
Science
The scientific method was involved in making the predictions as to how much weight the bridge would hold and then testing those theories. In addition, students can make an hypothesis as to which bridge types are strongest (arch, beam, girder, cable-stayed, suspension, cantilever, truss, etc.) as well as which materials make for the best construction.
Technology
The technology integration is seen in the materials and how they are used. It was 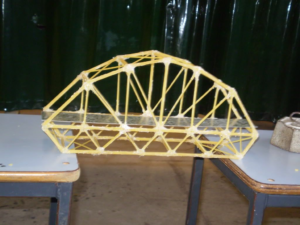 also revealed in the discovery of which binding materials (glue, clay, gumdrops, marshmallows) worked best with the structural materials (Popsicle sticks, spaghetti)
Engineering
The engineering of the bridge began at the blueprint phase. Students researched real-world constructions and modeled their bridges from that research. The groups then learned how to interconnect the materials to form different shapes to provide structural support for the bridge. Groups had to take into consideration the span, the weight, and the other forces acting upon it.
Mathematics
Mathematics entered this lesson when the students made calculations as to the dimensions of the bridge, the recording of the weights, the measuring of the span etc. There was also geometry in the decision to use certain shapes for their structural properties.
Extend-Expand-Explore
Extend the lesson by placing specifications on the bridge design like having it span an offset or uneven gap. Consider raising the difficulty level by restricting the number of parts that may be used. Expand the project to include different materials that can be used for this project. Explore some famous bridges around the world using Google EarthTM. Present some interesting facts about these bridges to the class.
Lesson Plan
Title: Build a Better Bridge
Objectives: To design and construct a bridge to span a predetermined gap and hold maximum weight
Materials:
- popsicle sticks

- clay
- glue
- marshmallows
- spaghetti (uncooked)
- gumdrops
- KynexTM building toy
- Set of pan balance weights
Procedure:
- Decide upon your building materials.
- Create a blueprint.
- Construct the bridge based on the blueprint design.
- Test the bridge to see how much weight it can hold before it begins to crack.
- Repair the bridge and put it through the “earthquake” test.
Conclusion:
Test the bridge to ensure it spans the pre-determined gap. Then proceed to add increasing amounts of weight on the bridge. Record the weight at which the bridge begins to crack. How can we improve the integrity of our bridges? What type of bridge is strongest?
-Christopher Masullo Ed.D


Comments are closed.